
I had the opportunity to install one of the first Exadata X4-2 frames prior to Oracle’s announcement, which occurred on December 11, 2013. The Exadata X4 improves on the already popular Exadata brand, while proving the scalability and flexibility of the Exadata platform.
The installation also introduces new versions of software. The new software includes software for the configuration tool, installation and storage cell. This blog post addresses the changes associated with the configuration tool and the installation process. I am sure that we will be posting more blogs with respect to the storage cell software changes as we continue to test in our lab.
Configuration Tool
The new configuration tool represents a completely re-vamped configuration tool. The new configuration tool supports the old platforms, including Windows and Linux. However, they also include support for the Mac OS platform. As a Mac user, I am very happy for this addition, which makes it easy for preparing customer installation documents.
Apart from the fact that the configuration tool now supports Linux, Windows and MacOS, there are multiple changes within the tool and the output of the tool. I will post another blog supporting the complete changes to the new configuration tool.
With respect to the X4 implementation, the changes to the output of the configuration tool represent a “no-nonsense” approach to the new tool. The following bullet points outline the new output.
- <cluster>.xml – The actual configuration file that supports the onecommand process.
- <cluster>-checkip.sh – Reads the “xml” file and performs the checkip process that was a pre-requisite of the old installation process. This file was added with the December version of the installation files and was not originally planned.
- <cluster>-InstallationTemplate.html – represents a new layout of the installation template from before. The new layout includes a new table identifying most of the required information in a much smaller file. Although useful, the new layout leaves some detail out. I believe Oracle is still adjusting this information.
- <cluster>-preconf_rack_0.csv – Represents the “preconf.csv” file from before, which is used during the “apply config” procedure. This file supports the definition of the IP addresses for all the Exadata machines.
First Look
So, as expected, the visual inspection of the new Exadata X4 does not reveal anything different from the Exadata X3 frame. The quarter rack X4 looks the same as the quarter rack X3. However, the new half and full rack X4 will be different than the standard X3 rack of the same configuration. With the X4 standard configurations for the half and full rack, the Infiniband Spine switch is not included as before. However, upon detailed inspection of each component, the changes are visible.
Compute Node
The compute node details represent the changes to the configuration of the compute nodes. These changes include larger local disks, new processor class and core count as well as changes in the memory configuration.
The storage processor output reveals the new frame type, the machine identifier is removed for customer anonymity.

Internally, the review of the processors reveals forty-eight entries like the one listed below.

The forty-eight entries represent two processors with twelve cores for a total of twenty-four cores. Each core is dual threaded, which provides the forty-eight count.
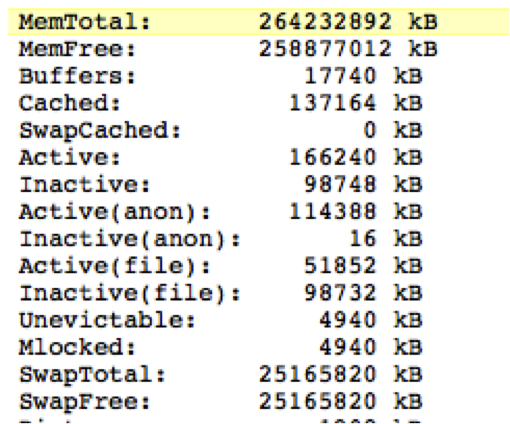
At the memory level, the Exadata X4 provides a minimum of 256GB of RAM, which is expandable to 512GB of RAM. The display below represents the customer’s minimum configuration of 256GB of RAM.
The rest of the compute node configuration remains consistent with the X3 implementation.
Storage Cell
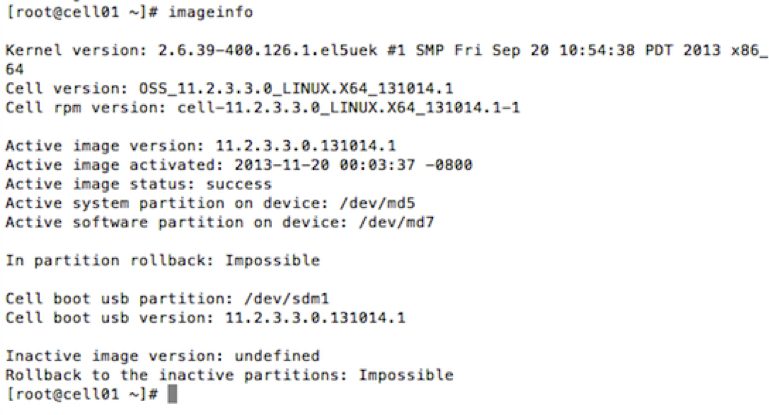
The storage cell configuration includes the same number of processors, but additional memory and different disk configuration options. Also, the X4 includes the new storage server software, as indicated in the below diagram of the imageinfo command.
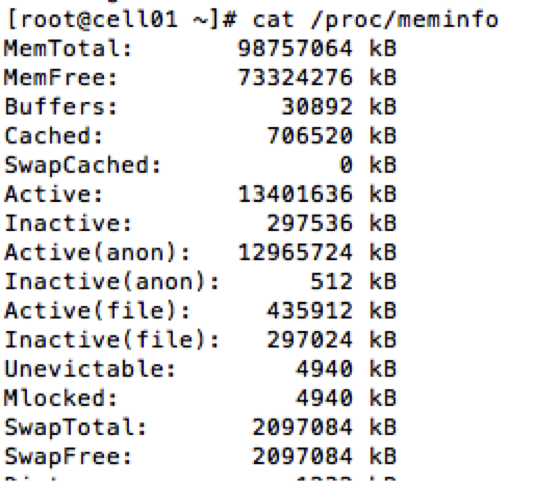
As indicated in the following diagram, Oracle increased the amount of memory for the storage cells from 64GB RAM to 96GB RAM.
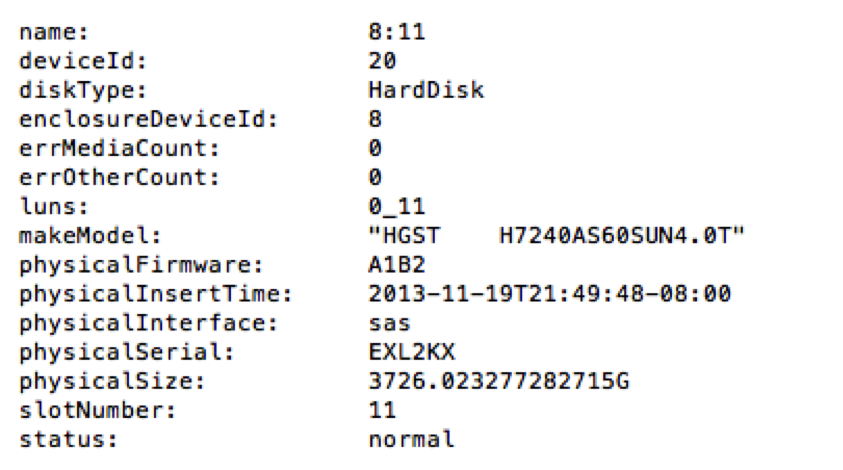
The capacity of the storage cell components increase as well. These components include the flash memory and the physical disk. The Exadata X4 storage cell disk options include either a 1.2 TB 10,000 RPM disk high performance drive or a 4 TB 7,200 RPM disk high capacity drive. The associated diagram represents the customer’s choice of the High Capacity selection with the 4TB drive.
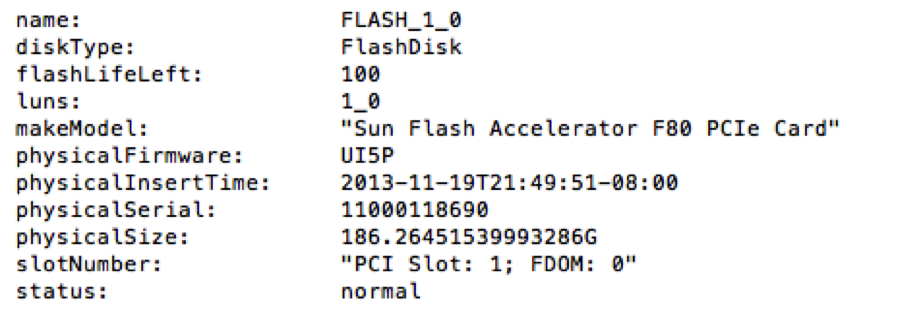
The flash component includes four F80 PCIe cards, each with 4 200GB flash modules as presented in the below capture.
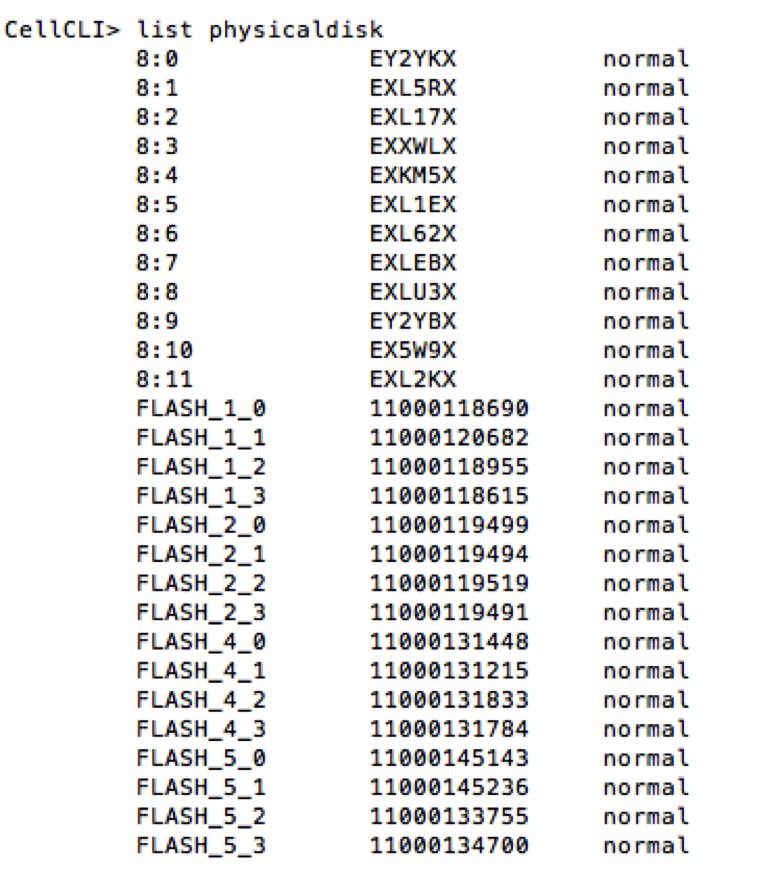
The following diagram represents the “list cell physicaldisk” presenting the 12 physical disks and the four F80 flash cards with four independent flash modules each. The total amount of flash by cell is now 3.2 TB of flash cache.
Configuration Process
The physical implementation process contains the same steps for the hardware configuration. However, the expansion of the local drives and a modification to the “reclaimdisks.sh” represent a change in the duration of the pre-configuration.
In the past configurations, the reclaim disk process would run in the background and would run in about one hour. At the end of the disk reclaim process, the nodes would re-boot.
However, the new reclaim disk process forces the reboot of each associated node and then executes the disk rebuild before network services are available. The only way to monitor the reclaim disk (or access the system) is through the console. The new reclaim disk process takes approximately three hours, as indicated in the below capture of the console display.
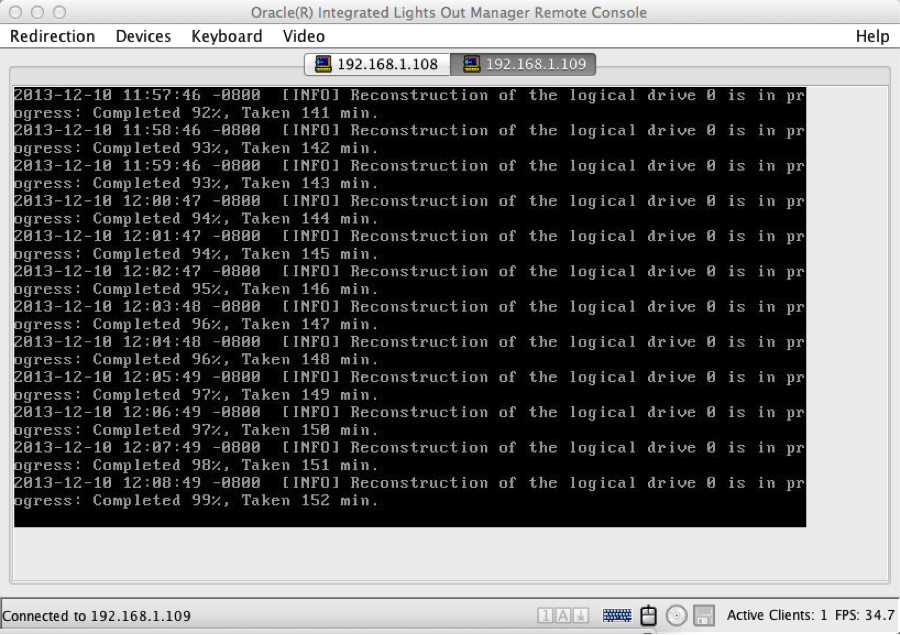
As indicated above, the new size of the local drives (600GB) contributes to the new duration of the disk reclamation process.
At the end of the disk reclamation process, the compute nodes reboot and the Exadata frame is ready for the IP assignment through the “applyconfig.sh” process. At the completion of the “applyconfig.sh” process, the configuration moves from the hardware procedure to the software configuration process and the “OneCommand” initiation.
OneCommand Procedure
With the Exadata X4 implementation, the software configuration includes a new “OneCommand” process. This process includes fewer steps than the previous Exadata frame process, but these steps include a consolidation of the old steps.
The following diagram represents the new set of steps for the installation process.

The following sections outline a few notes about the above steps.
The first thing that becomes evident is the “missing” /opt/oracle.SupportTools/onecommand directory. In previous versions of delivered Exadata frames, the “onecommand” directory would contain a version of the onecommand scripts. Generally, we would replace this directory with a copy of the latest onecommand scripts downloaded from MOS.
The new implementation implies a direct correlation between the latest MOS version and the new configuration script. This correlation also challenges the old “image” process that some installers utilize, as the image may change with each patch update.
Location for Implementation Files
After the new onecommand directory is populated, the preparation step consists of loading the “required” files for the installation. These required files include the Oracle distribution files, the latest patch files and a version of OPatch placed in a staging directory. With the new configuration process, the new staging directory is now /opt/oracle.SupportTools/onecommand/WorkDir.
The second step in the configuration process validates these files are placed in the correct location.
The other change, with respect to the installation process, consists of the execution of the “OneCommand” process. The new configuration process requires the execution of the install script, the identification of the configuration script and the step. The following command executes the “list step” process from the install command.
# cd /opt/oracle.SupportTools/onecommand
# ./install.sh –cf <cluster>.xml –l
The execution of specific steps include the following command.
# ./install.sh –cf <cluster>.xml –s <step #>
The log files supporting each step are now located in the following location:
/opt/oracle.SupportTools/onecommand/log
With future blogs, I will review the configuration process for the new Exadata environment.
